How to Test Your Smoke Detector
Important Notice: Our web hosting provider recently started charging us for additional visits, which was unexpected. In response, we're seeking donations. Depending on the situation, we may explore different monetization options for our Community and Expert Contributors. It's crucial to provide more returns for their expertise and offer more Expert Validated Answers or AI Validated Answers. Learn more about our hosting issue here.
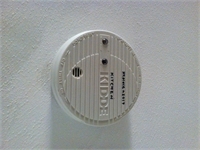
How to Test Your Smoke Detector

Smoke detectors and their location in virtually every home and business are mandated by law. These detectors should be maintained and tested regularly, checking for battery life and detection effectiveness. The process of how to test your smoke detector is easy and may save your life.
The "TEST" Button:
Virtually every smoke detector has a built-in test you can perform anytime you pass by the detector. By simply reching up and depressing the "TEST" button on the face of the unit, you can instantly determine whether the battery is up to par. You should be greeted with the piercing sound and often a flashing light, indicating the unit is functioning as normal.
The Match Test:
Strike a match and hold it under the smoke detector. Should the unit have a strong battery and functioning sensor, the detector will quickly activate. Test the smoke detector in this manner if the unit does not have a "TEST" button, or if pressing the button fails to result in an audible warning. It is important to determine if the sensor is clogged or blocked. Alternately, if you had something recently burn in your oven or anything else that brought smoke into the home and the closest detector failed to go off, that is a clue that further investigation of the unit is required.
Document Battery Changes:
Batteries in smoke detectors should always be replaced every six months to a year. This should be done even if at this interval the detector passes your tests. Write on the face of the unit the date of the battery change, using a fine-tip marker. A common practice is to change the battery when you change the clocks in the Fall and Spring for daylight saving, but the important part is that you are diligent about it. Replace the entire detector every 8 to 10 years, or if the unit repeatedly fails your tests.