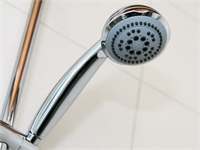
How to Install a Shower Head
Important Notice: Our web hosting provider recently started charging us for additional visits, which was unexpected. In response, we're seeking donations. Depending on the situation, we may explore different monetization options for our Community and Expert Contributors. It's crucial to provide more returns for their expertise and offer more Expert Validated Answers or AI Validated Answers. Learn more about our hosting issue here.

How to Install a Shower Head
You must be logged in to post a comment.
Have you ever found yourself standing in your shower and wishing that half the water wasn’t spitting onto the shower curtain while the other half trickles slowly to the tub floor? Perhaps it’s time for you to think about getting a new shower head. If you have never done your own home improvements, something like replacing a shower head may seem a little intimidating. However, changing a shower head is something you can do without any special training or special tools.
Before you decide to remove your existing shower head, you need to determine what kind of shower head you want to use. There are three basic types of shower heads, each with their own benefits.
Fixed shower heads
Fixed shower heads are the standard type of shower heads. They mount directly to the shower pipe. The most basic of fixed shower heads mount to the shower pipe and spray in the direction the pipe is facing. There are also fixed shower heads that pivot, allowing you to adjust the direction of the spray.
Hand Held Shower Heads
Hand held shower heads give you the benefit of a removable head attached to a flexible hose that allows you to lift the shower head from the wall and bathe while seated, wash those hard to reach areas and make it easier to wash children and pets. It also comes in handy when you are cleaning the shower. Many hand held shower heads include multiple adjustable spray settings.
Rain Shower Heads
Rain shower heads mount higher than standard fixed or hand held shower heads. They are also much wider. Rain shower heads don’t spray in the relatively high pressure manner that both fixed and hand held shower heads often use. Instead, they simulate the gentle fall of rain.
Each of these three types of shower heads offer models designed to conserve water without compromising on your shower experience. Upgrading your existing shower head to one of these models can save you in water costs.
Installation
Things You’ll need:
Adjustable wrench
Teflon tape (also commonly referred to as Plumber’s Tape)
Scouring pad
Rag
Step 1
Unscrew the existing shower head. Grasp the base of your shower head and rotate it counter-clockwise. If you are unable to remove it by hand, use an adjustable wrench to assist you.
Step 2
Clean the threads on the shower pipe. Use a scouring pad to wipe away any mineral build-up on the threads of the shower pipe. If there is any plumber’s tape wrapped around the threads, remove it. Use a razor blade if you are unable to unwrap the tape. Wipe away any remaining debris with a rag.
Step 3
Install the new shower head. Wrap some plumber’s tape around the threads of the shower pipe in a clockwise direction. Wrap the threads 2-3 times to ensure a proper seal. Screw the new shower head mount onto the shower pipe by rotating it in a clockwise direction. Hand tighten it. Don’t use a wrench to tighten it, because this may damage the mount.
Step 4
Turn the water on and activate the shower head. Check for any leaks around the connection. If you see any water leaking from the connection, tighten the connection until the leaks stop. If you can’t tighten it any more and it is still leaking, remove the head and add some more plumber’s tape to the threads of the shower pipe.
Note:
Shower head installation procedures can vary slightly from model to model. Refer to the instructions included with your new shower head for any installation instructions not mentioned here.
Cover photo: Shower Head – Public Domain photo by Petr Kratochvil